How to play
Drive the desert highway and the Korean highway, seven lanes all going your way, as far as you can. There is no time limit, and it ends when you crash. The opening scenery is picked at random, then it switches every 2 km. The desert and Korea play the same, and now and then you land in a fantasy stage (see the last paragraph). The throttle is automatic: you start at 150 km/h and get 8 km/h faster every 400 m, reaching 220 km/h at 3.5 km. All four vehicles are the same, and boosting, launching off a carrier or keeping the sports car on the ground takes you a little faster.
On the ground, hold ◀ or ▶ to steer. There are no lanes to stick to: drive anywhere you like. The lane lines are just paint. While you hold a button the nose swings over, and the more it swings, the faster you move sideways. When you let go the wheel recenters, but the nose doesn't turn back by itself: the vehicle keeps driving at that angle until you steer the other way to straighten out. You only steer while your wheels are touching something (the road, another car's roof or a carrier); once you're in the air, the same buttons become your side jets (see below), and you keep drifting the way you left the ground.
There's a median on one side and a guardrail on the other, and hitting them too hard is a crash. Brush one at a shallow angle and you just scrape along it, throwing sparks and losing speed; until you straighten out you keep scraping, so steer back the other way yourself. Hit it at a steep angle or too fast sideways, or drift into it hard in the air, and it counts as a crash.
If you can't dodge, jump: press ◀ and ▶ together to fire both jets and push your vehicle off the ground and over the car. While both are held the whole vehicle goes up, and when you let go it drops. In the air, ◀ on its own is the left jet and holds up the left side, and ▶ on its own is the right jet and holds up the right side; let go of one of the two and the other keeps firing by itself. The vehicle tilts in the air: fire the jet on whichever side is dipping, and tap and release instead of holding, which is steadier. Firing the jets while tilted makes you drift sideways. What a press does is decided the moment you press, and it stays that way until you let go: if you're steering when you get thrown into the air, that press won't fire a jet, and if you land while holding a jet, you won't suddenly steer, so let go and press again. If your thumbs land a split second apart when you press both, that's fine: the nose won't swing first.
Hold ▲ to boost: a jet at the back pushes you forward. It works on the ground and in the air and burns gas from the same tank as the side jets. It burns gas the whole time you hold it, even at top speed. Let go and you drop back to cruising speed in about 3 seconds, so keep holding to stay fast. It comes in handy for clearing a long line of cars, beating a checkpoint clock, or hitting a carrier ramp fast enough to get thrown higher.
Every car on the road is slower than you (60–85 km/h), and you're much faster, so look ahead and steer early. They never change lanes, and cars driving side by side in a group all go the same speed. Farther on the traffic gets busier and denser: one car blocking a lane, a few side by side with one gap left open, staggered cars you weave through, and now and then a solid wall across all seven lanes that you have to jump. Hit the back or the side of a car and it's over.
Car carriers are too long to jump, so drive right up onto them. The two ramps at the back of these two-level car carriers push you up, and the more speed you have over the carrier, the higher you fly (60 / 100 km/h faster throws you about 5 / 6 m). Each carrier you ride refuels you once, and the moment you fly off the upper deck you get an extra burst of speed that slowly fades back to cruising. You can drive on the upper deck, but it doesn't count as a roof stomp. When a whole row is blocked, driving up a carrier is another way through.
Three ways to refuel: the ground, flying over cars and carriers. Each vehicle has a single tank (600 L for the sports car and the scooter). Pressing ◀ and ▶ together burns 80 L per second, jumping one sedan costs about 70 L, and boosting burns 25 L per second; the Gas Guy's big jets drink more (660 L tank, 120 L per second for both jets, 37.5 L per second for the boost); steering is free. With your wheels down you refill 5 L per second, and in the air you don't. Skim over another car's roof and you get a gulp of gas back (a Graze gives the most, and a Close pass or a Roof stomp gives some too), and every carrier you ride up refuels you once. Now and then a small green gas can sits on the road: drive through it for 50 L (not on the Mushroom Loop). So jump close and jump clean, and the gas comes back. When the gas runs out the jets stop, and all you can do is drive on the ground and steer around the cars.
Watch the crosswind. There's no wind at first. It picks up after ten-odd seconds, starting light and maybe getting stronger the farther you go. It only changes every so often, and about 3 seconds before it does, the screen shows the new direction and speed; the current wind is always on screen too. On the ground the wind slowly pushes you to one side, so correct with the steering; in the air it pushes harder and tilts the vehicle. The scooter gets blown around the most, then the Gas Guy; the sports car and the Watermelon Truck handle it better.
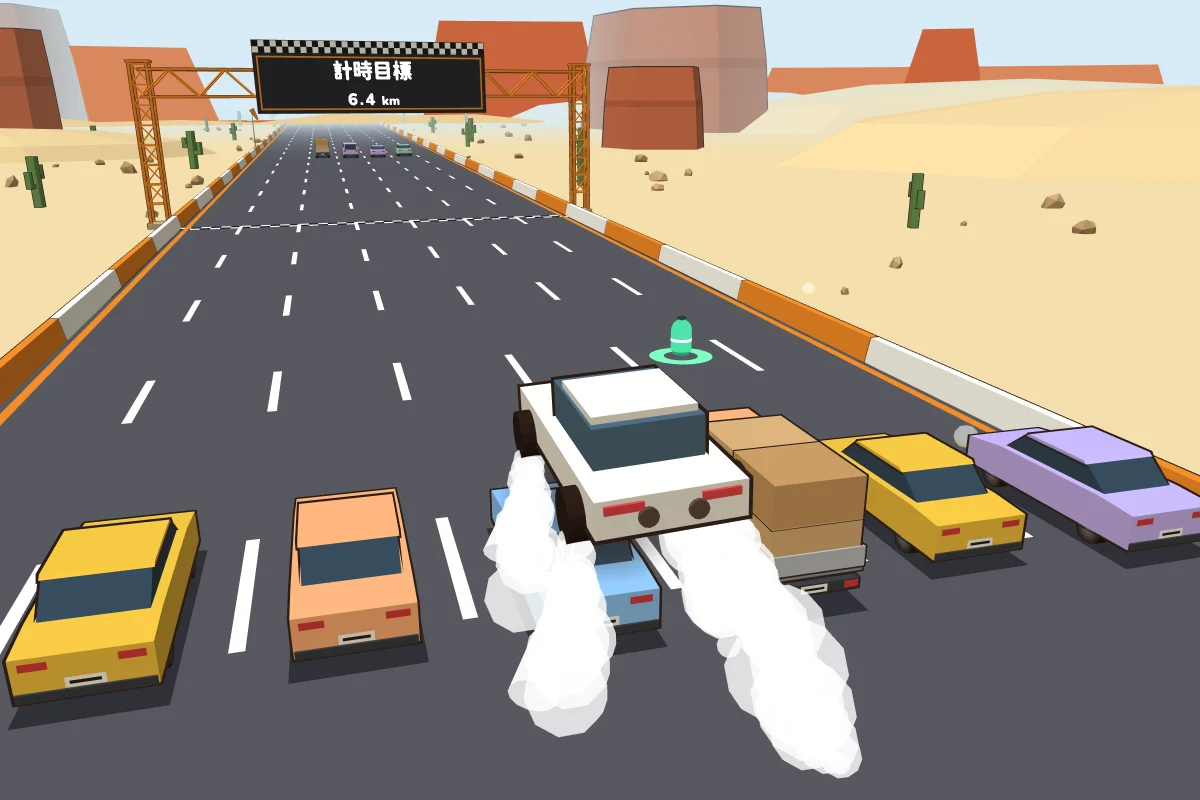
Checkpoints: reach the big sign in time for bonus points. There is one checkpoint at a time, such as “1.4 km in 30 seconds”, marked by a huge gantry sign across all seven lanes that you can see from far away; the screen shows the seconds left and the meters to go. Make it in time and you get bonus points, more for every second to spare; miss it and you are disqualified, and the run ends. For the first one, cruising speed alone falls just short, so a quick boost, a carrier or the sports car’s ground speed-up gets you there. Each one after that is farther, and from the 10th on you need to boost for about half the time just to scrape in, which takes more than half a tank. Make it and the gas you boosted with comes back. The faster you go, the less time you have to dodge, so whether to go for it, and whether to spend your gas on boosting or save it for jumps, is your call.
The higher you fly, the weaker the jets. Within 15 m of the ground they run at full power. Above that they push less and less, and holding ◀ and ▶ together only keeps the sports car up to about 26 m. On the altitude gauge at the right of the screen, green is full power, yellow is weakening, and the dashed line marks the ceiling, the height this vehicle can hold.
Watch the lights when you land. The two lights on the screen show your falling speed and the vehicle's tilt. When both are green you're safe (for the sports car: falling at 10 m/s or less, tilted 15° or less). Landing too hard, or tipping over because you're too tilted, also ends the run. Landing on another car's roof follows the same rules: if you stay upright, you slide forward off the front and keep driving.
Fantasy stages: each time the scenery changes there is a 25% chance of a fantasy stage, and the next change takes you back to the desert or Korea. The opening is always a regular scene. There are four fantasy stages, and a message tells you what each one is about when you enter.
Mushroom Loop: the road curves into two giant loops. It looks spectacular but drives like a normal highway. Mushrooms sit on the road: eat one to grow for 8 s and smash the cars ahead without dodging (+50 points each). But you are twice the size and much heavier, so your jets push only half as hard and you can barely jump, and a carrier still launches you into the sky.
Moon Surface: gravity is halved, so you jump higher and longer and landings are gentler, but your tires grip only half as well, so turns feel mushy. There is no air, so no crosswind. Craters leave holes in the road with nothing to drive on: jump over them, because falling in ends the run.
Toy Town: carriers become giant carriers that launch you much higher and farther, but their ramps and decks are tilted, so you leave them crooked and must jet yourself level before landing or you will flip. Some of the cars are double size too.
Cloud Highway: whole rows of road are missing, with a sea of clouds below, and falling in ends the run, so jump them. Cloud columns hold updrafts that push you up when you fly into them in the air (they do nothing on the ground).
Scoring
Score = distance driven + bonuses for flying over cars + checkpoint bonuses. Bonus text pops up above the car. The big number at the top of the screen is your score, and the small text under it is the distance. The Watermelon Truck has a multiplier: everything counts ×1.2 while it still has melons, and ×1.1 once they are all gone.
- Distance1 pt per mEvery meter you drive counts, right up until you crash.
- Close pass+20 ptsYour wheels pass 0.3–1.0 m above the roof at the closest point. Any farther earns nothing.
- Graze+50 ptsWhile you jump a car, your wheels come within 0.3 m of its roof.
- Roof stomp+10 ptsYour wheels touch another car's roof and you don't crash, once per car. (If you touched the roof, it doesn't count as a Graze or a Close pass.) A carrier's upper deck doesn't count.
- Combo+10 ptsIn a single flight (from leaving the ground to touching the road or a roof again), every car after the first one that earns a Graze or a Close pass gets an extra bonus.
- Checkpoint+400 ptsPass under the big checkpoint sign before time runs out. You also get 40 more points for every second left, plus 60 L of gas and a refund of the boost the checkpoint calls for (more for later ones). Miss it and you are out.
- Multiplier×1.2Watermelon Truck only: while it still has melons, every point you earn is multiplied. Once they're all gone, it drops to ×1.1.
Example: 1,874 m driven, 14 close passes, 5 grazes, 3 roof stomps and 6 combos make 2,494 points.
Ranks
Your rank depends on the total score of one run, and all four vehicles share one table. The thresholds are still a draft and will be tuned after phone playtests.
The four vehicles
All four vehicles cruise at the same speed (the throttle is automatic). They differ in tank size, how hard the jets and the boost push, how well they take a hard landing and how much the crosswind pushes them. The sports car speeds up on the ground, and the Watermelon Truck has a score multiplier (see the tags next to the names). Each vehicle keeps its own best score.
- Sports CarGround speed +25 km/h
- Tank
- 600 L
- Side jet
- 0.80 G
- Boost
- 1.43 G
- Ceiling
- ~26 m
- Safe fall
- ≤ 10 m/s
- Safe tilt
- ≤ 15°
Tesfla's white sports car: the steadiest and the easiest to learn. It lands on four wheels, so it can take a bit of tilt. With its wheels down it keeps speeding up, well past cruising speed, then slowly drops back once it's in the air. Hugging the ground makes checkpoints easiest, but you're going faster, so there's less time to dodge.
- ScooterCatches the wind
- Tank
- 600 L
- Side jet
- 0.99 G
- Boost
- 1.91 G
- Ceiling
- ~30 m
- Safe fall
- ≤ 11 m/s
- Safe tilt
- ≤ 8°
Lighter than the sports car (about 200 kg with the rider and the jets), so the jets push harder and hold it higher. In the air, the rider straightens it out on their own when it's only tilted a little; tip it too far and there's no saving it, and since it lands on just two wheels and the rider's feet, even a little tilt on landing tips it over. It's light and the rider sits up high, so a crosswind shoves it around more than any other vehicle here, and you'll be correcting the steering a lot even on the ground.
- Gas GuyCatches the wind
- Tank
- 660 L
- Side jet
- 1.06 G
- Boost
- 2.04 G
- Ceiling
- ~31 m
- Safe fall
- ≤ 11 m/s
- Safe tilt
- ≤ 8°
The propane delivery motorcycle you see all over Taiwan, with four propane tanks stacked sideways on the back. It weighs 40% more than the scooter (about 280 kg). Its jets are a size bigger and the strongest of the four, and with all that weight the crosswind pushes it around less than the scooter (still more than the sports car). The price is that it drinks gas: just holding it up burns 1.4 times what the scooter burns every second, and boosting costs more too. The tank is 660 L (10% bigger than the scooter's), and it still doesn't last as long. It's heavy, so the rider has to work harder: it still straightens itself out in the air, just more slowly than the scooter, and if it tips further, tap the side jet yourself to hold it level.
- Watermelon TruckScore ×1.2 (×1.1 when empty)
- Tank
- 800 L
- Side jet
- 0.62 G
- Boost
- 0.82 G
- Ceiling
- ~21 m
- Safe fall
- ≤ 8 m/s
- Safe tilt
- ≤ 11°
A one-ton Korean truck that rolls down the street selling watermelons, with the bed piled high with melons: about 2.5 tonnes with the load. Everything you score counts ×1.2 while it still has melons, and ×1.1 once they're all gone. Fully loaded it's heavy, slow to lift off and slow to boost, so steer away early or press both early. It's top-heavy, and once it starts wobbling it won't stop. It has the biggest tank (800 L). Land too hard or too tilted and the melons roll off, and the truck gets lighter; with every melon gone it weighs and pushes just like the sports car. Skim a roof and the driver shouts out his sales pitch in Korean through a loudspeaker.
"Side jet" and "Boost" show how hard each one pushes, in multiples of gravity (G). "Ceiling" is the highest the vehicle can stay up with ◀ and ▶ held together (above 15 m the jets start to weaken). "Safe fall" and "Safe tilt" are the ranges where both lights are green and you are sure to stay upright.